Showing posts with label webster's pages. Show all posts

Tuesday, September 8, 2015

Webster's Pages - So Many Layers

It's so hard to imagine that I've been married for 3 years now. Where has the time gone? It seems like I'm living day to day and suddenly look back to see that another month has passed. Wow, it sure sneaks up on me! When I think back to my wedding day, I can't help but smile and laugh at most of it. As a bride I agonized over every small detail and thought that I had made enough plans (and spread sheets) to have complete control over my wedding.    Ha! Not even close!

The actual day seemed to dash by in a blur: tons of things that I forgot or forgot to do. Hubbie even had to drive back to his parents' home because I forgot my shoes! Well, getting myself into that corset and dress by myself was like trying to zip up a Spandex sleeping bag. After I had finally squeezed myself in and zipped myself up, I stood back to admire my handywork. Only then did I realize that I had forgotten to put on my puffy slip.... the one that has to go on first before everything else.

I was very tempted to get frustrated and start systematically ripping off my dress, but instead I smiled and said a very enthusiastic "SCREW IT" and just laughed. Now looking back, I'm glad I did because without that puffy slip, my dress took on a very ethereal flowy look. I like it better!

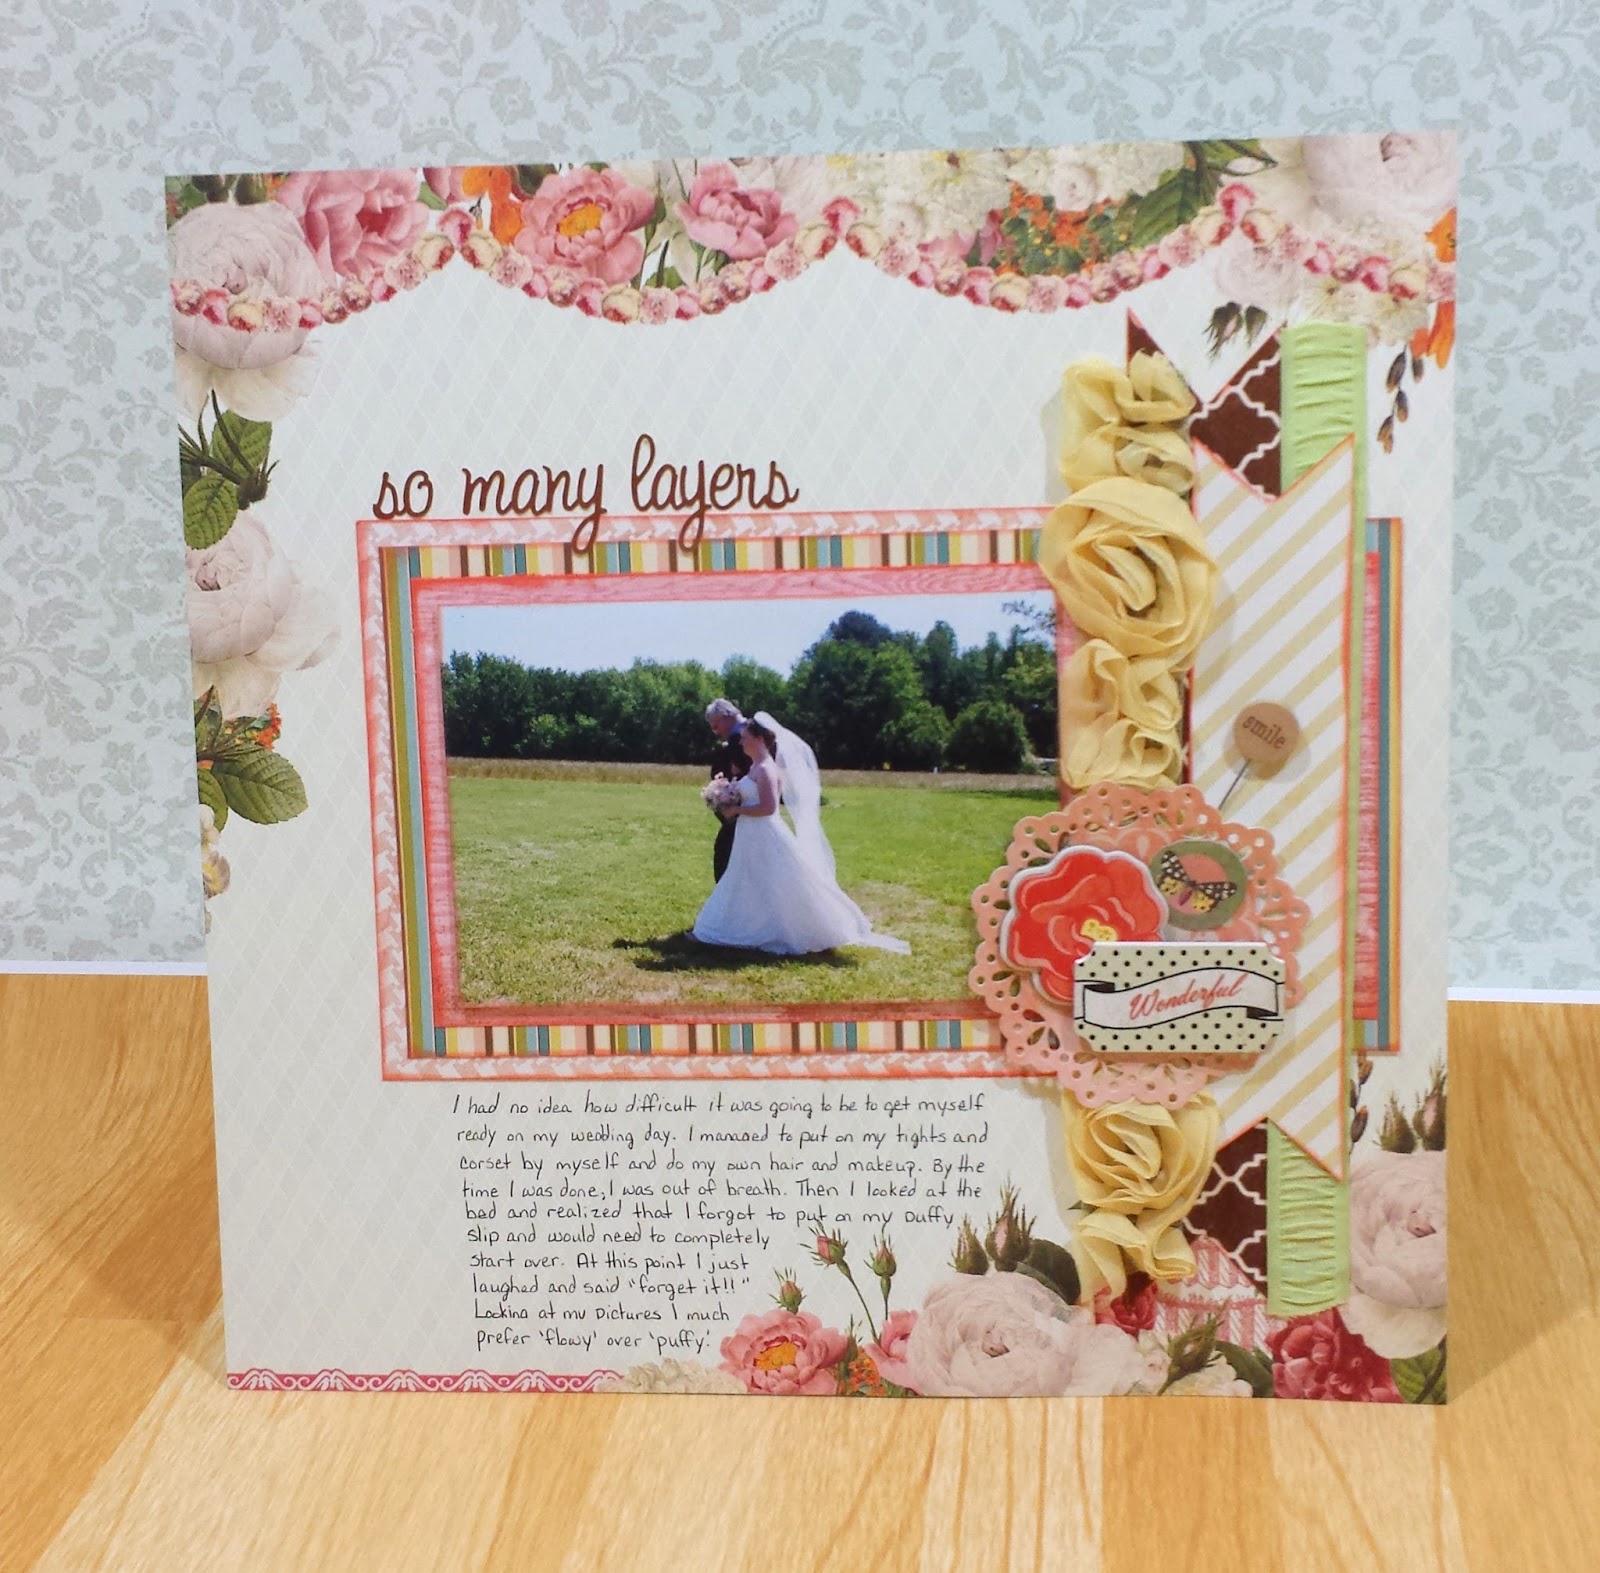


Paper - Webster's Pages-Let's Celebrate Collection, Webster's Pages - Garden Gala - Fresh Air, My Mind's Eye - Follow Your Heard - Be Happy - Favorite Things, My Mind's Eye - Lush - Brown Diamonds Paper   Embellishments - Little Yellow Bicycle - Stick Pins - Wood Words, Michaels - Wood Embellishments - Songs of Spring   Ribbon - American Crafts - Premium Ribbon - Greeting, American Crafts - Premium Ribbon - Yellow Rosettes


I'm so glad my Mother-in-Law was taking pictures because she caught one of my favorite shots: my dad beside me and my dress in all it's flowy goodness. This layout was all layered up with bits and pieces of scrap and ribbon. I tried to incorporate the red tones of the Webster's Pages paper with my inked edges. Unfortunately, I purchased most of the supplies when I got engaged, so I can't find any active links to any of it.

Hope you enjoyed this!


Tuesday, February 3, 2015

Hello Again!

Hello again friends! I hope some of you are still reading.

Time sure does fly! We've managed to move to two different states and two completely different jobs. Hopefully life has settled down enough that I can get back to my blogging world. Here's some of what I've been up to.


I'm still scrapping my wedding album. I can't believe that it's been over 2 years and I'm still working on it. (Please excuse my photos for a little while. I'm having to use my phone's camera nowadays).


I had the opportunity to go on a once-in-a-lifetime trip to Paris France with my hubbie. I'm probably going to be scrapping those pictures until the day that I die!


And now I'm making Project Life cards on the side for my Etsy shop. Make sure to stop by and check out some of my goodies! https://www.etsy.com/shop/VibrantValley
I'm slowly adding things as I can. Life sure is getting interesting. :)


Monday, January 16, 2012

Bedtime Hug - Webster's Pages & Hot off the Press

Chloe has been a part of our family for about three months now but I haven't scrapped a single page of her yet. I've left some of her pictures on my desk hoping to get a little inspiration, but I've been constantly stuck. (I guess all the wedding stuff has become my prime focus.) So, I was looking around the internet and came across two separate sources of inspiration: 1.) Color Combos Galore #215  2.) Lynn Ghahary - Country Boys. I loved the soft colors and feminine texture of the CCG challenge and the soft hearts on Lynn's page. So here's my attempt to merge the two!

Hot Off the Press - Color Me Flowers, Webster's Pages - Lullaby Lane - The Arrival, Ranger - Tim Holtz - Distress Ink - Spun Sugar,  Ranger - Tim Holtz - Distress Ink - Vintage Photo, American Crafts - Thickers - Maple - Black, Fiskars Border Punch - Flowers

The background paper was so much fun to work with because it was an ink resist paper. I started out rubbing it with Spun Sugar but it seemed too pink. So I opened up the ink drawer and looked for a neutral. I finally decided on Vintage Photo to tone it down with. I'm pleasantly surprised with the exact hue I finished with. My only words of wisdom with these kinds of paper is to start out with your lightest ink first. It's easy to add color to darken, but it's a lot harder to lighten once you've made a mistake. Try testing a small corner or an area that you plan on covering up.


I've really been into the texture that border punches give. So I decided to stack a couple of them on top of each other. I liked the look that I got, but they just seemed to blend in together too well. So, on every other edge I rubbed some more Vintage Photo ink. I really gives it a little more depth. Some machine stitching also made an appearance on this layout. It's just such an easy way to make a layout look more finished. I stitched a border around my entire layout as well as around my photo. The stitching also appeared on those sweet little hearts. Speaking of those hearts....

here's those adorable little hearts from Lynn's page. I just loved the sweet feel it brought to the page as well as the texture that it brought from the right to the left. I always try to balance out my page. I had a heavy texture on the right, so I needed texture on the left. I did the same with the title. My little puppies are black and white so it's always hard to work black in somehow. I know that it would probably make more sense to use the brown letters, but they just seemed to fade into the background. By using the black letters, I brought the black from the photo over to the left side of the layout.

I had fun on this layout. It was the first time I've ever used an ink resist paper but I've concurred my fear. I actually want to do more with these diverse products. Hope you'll join me for the next time!

Thursday, January 12, 2012

Butterflies - Webster's Pages & Echo Park

I've had so much fun planning and scrapping wedding stuff, so of course I had to scrap that beautiful ring! I've always loved the look of Webster's pages, but I've never had anything that I could use them on. Now, I broke them all out! The color on "Lullaby Lane - The Arrival" is just the perfect shade of blue. It's especially perfect because that's the exact color for my entire wedding! I knew I had to use it.

Webster's Pages - Lullaby Lane - The Arrival, Echo Park Paper - Victoria Gardens - Rose Garden, 3D foam dots,  Inkssentials - Craft tags #5, Ranger - Tim Holtz - Distress Ink - Iced Spruce, twine, pearl string from Hobby Lobby, Ranger - Acrylic Dabber - Snowcap, Fiskar's Border Punch - flowers,
The journaling reads "I still can't believe that we are actually engaged! I've waited for this for a long time and now that it's here, I've got butterflies!" I absolutely loved all of the texture that the pages had. I tried to keep the overall layout simple, but luscious. I used a fiskar edge punch around the edges to give texture without fluff. The tag was lightened a little bit by rubbing on an acrylic dabber in Snowcap. Then I used my sewing machine to go around the edges.


I had a duplicate of the background so I used as much of the backside as possible. It had such pretty flower groupings and textured cream paper. I used an exacto knife to cut them out and some 3D dots to really draw attention to them.

I had a lot of fun with this page and it's one of my favorites. It was so much fun trying a different style and look. I think it really paid off for this special page. I hope you all enjoyed this and I look forward to hearing from you!

Monday, January 2, 2012

Asking Permission - Echo Park & Webster's

Last month seemed to fly by in a second. I barely had enough time to get all my Christmas shopping done. Between doing some wedding DIY, family dinners, and working, I managed to get this layout done; but I had to wait until it was sunny enough outside to take pictures. I always set my layouts next to a window and use the natural sunlight to get my pictures. (I wish I had enough money to get a light setup for my photos.)

Echo Park Paper - Victoria Gardens - Rose Garden, Webster's Pages - Country Estate - Serenity, Tim Holtz - Distress Ink - Antique Linen, Tim Holtz - Distress Ink - Forest Moss Prima Marketing - Textured Alphabet Stickers - White

This layout is about my fiancĂ© asking my father for permission and is one of the very few layouts I have that doesn't include photos. I almost always have a photo, but this time I wasn't present for the conversation and therefore couldn't bring my camera. However, I think it just adds to the topic. The papers I used were so intricate and I knew they would quickly overwhelm my page. So, I decided to cut them up in strips instead and post them on white cardstock.


To help the give more definition to the strips of paper, I broke out the sewing machine and did a couple of cute stitches in a brown color. I loved the look of it so much that I also decided to stitch a border (or two) as well. The brown stitching also allowed me to bring in some Kraft paper as a solid. Solid papers are a necessity when working with bold patterns. Your eye needs a calm place to rest. Otherwise, it will start looking really busy.


I bought these alphabet stickers a couple of years ago and I love them. They're white fabric so I'm able to color them with whatever inks I want to match my layout. I was able to spritz them with some water and rub them with Tim Holtz's Forest Moss distress ink. The color was just perfect. But I had a happy accident when I was gluing them down. Apparently my letter 'S' was not yet fully dry and when I dropped it on my page it left a small green smear. So I had to do some damage control. I pulled some more kraft paper out and cut out a flourish with my Sizzix. It wasn't what I had originally planned, but I actually like it better that way.

Hopefully I'll have enough time to have another layout up soon. I'm just having so much fun right now and I want to savor it as much as possible. I want to say a huge thank you to all the wonderful comments I've received since my last post. You guys are just so wonderful. If you haven't started following my blog yet, now's a great time! Just click the little button to the right that says "Join this Site". I promise that you won't receive any spam mail from it. Thanks!

Sunday, June 12, 2011

Mini Album Surprise

I've been away for a while working on a surprise project. And here it is!


My wonderful FMIL and I decided to do a mini album swap. This obviously took me a long time. But I finally finished it. I tried to make it look like an old Victorian house.


This mini album was secured using hair elastics. You can see a close up of them in the image below.


The brown tag fits into the pink pocket for a journaling spot. The pink pocket then fits into the brown pocket for yet another.


I used a 3 inch span of floral ribbon to make a pocket. It was secured on three sides by Glossy Accents.


The orange circle is actually a can top from a frozen juice can. After it was washed, I cut out some pretty paper to fit inside of it. Then I filled it in with glossy accents. On the back, I attached another circle of solid Cardstock to give a nice journaling spot.


Here's a close up of what the 'siding' looks like. Each strip of paper was secured with Terrifically Tacky Tape. Hope you all enjoyed this!

List of Products Used:
Coredinations Cardstock
SEI- Morning Meadow Collection- Hazel
Kaiser Craft- Chanteuse Collection- Eco
                  English Rose- Florence
Webster's Pages
Paper Pizazz- Tan Catalog
We R Memory Keepers- Grandma's Kitchen- Pen Pals
Prima accents
Terrifically Tacky Tape
Glossy Accents